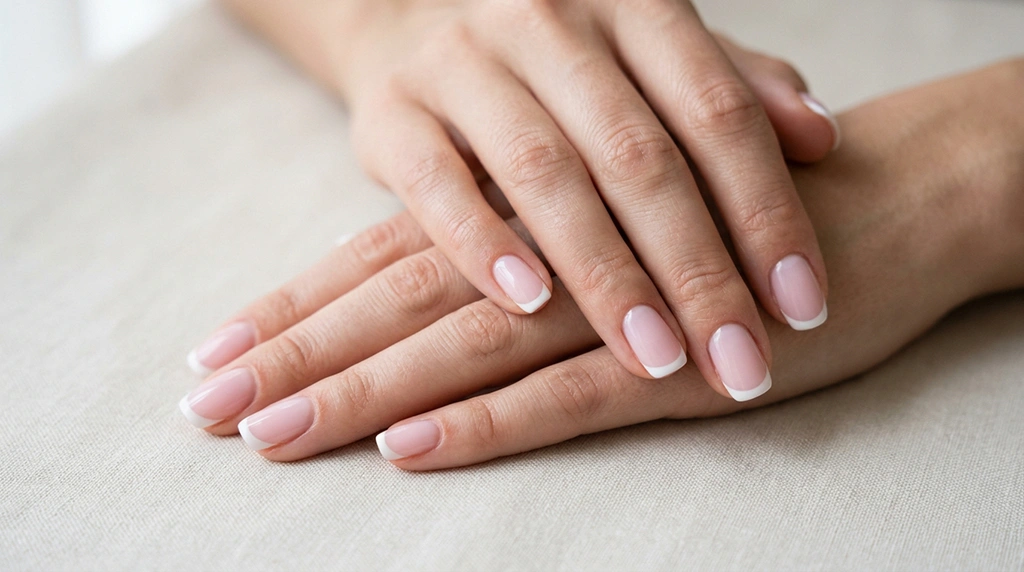
How to Do a Perfect French Manicure at Home: Step-by-Step Guide
A French manicure is one of those looks that seems like it requires a professional to do well — and for most people, the first few attempts at home confirm that suspicion. The white tip goes on crooked. The smile line wobbles. The whole thing chips by day three. But none of those problems are inevitable. They are almost always the result of skipping prep steps or using the wrong technique, both of which are easy to fix once you know what actually matters.
A professional-quality French manicure at home costs a fraction of a salon visit and lasts just as long if you do it right. Here is how.
What You Need Before You Start
The right tools make a significant difference. For a classic French manicure at home you will need: a nail polish remover to start with a clean surface, a nail file to shape and smooth the free edge, a nail buffer to create a smooth surface for polish adhesion, a cuticle pusher or orange stick, a base coat, a sheer pink or nude nail polish for the base color, a white nail polish for the tips, a top coat, and French manicure guide strips or small pieces of regular tape to create the smile line.
French manicure kits are available pre-assembled from most beauty retailers and typically include guides, the base shade, and white tip polish in one package. They are a practical starting point if you have not done this before. If you are building your own kit, choose a sheer or lightly pigmented base color — heavily pigmented pinks or nudes make the traditional French manicure look less refined.
Step-by-Step: How to Do a French Manicure at Home
Step 1: Prep Your Nails Properly
This is the step most people rush, and it is the most important one. Start by removing any existing nail polish completely using acetone-based remover. Then wash your hands and soak your fingertips in a small bowl of warm water for three to five minutes — this softens the cuticles and makes them easier to push back without tearing.
Use a cuticle pusher to gently push back the softened cuticle from the nail plate. Do not cut the cuticle unless you are experienced — cutting creates an entry point for infection and often results in ragged regrowth. File your nails into your preferred shape, working in one direction rather than sawing back and forth, which can cause splitting. Finish by lightly buffing the surface of each nail to remove ridges and create a slightly rough texture that helps polish adhere. Wipe each nail with a lint-free cloth or cotton pad dampened with remover to eliminate any dust or oil from buffing.
Step 2: Apply Base Coat and Base Color
Apply a thin, even base coat to all nails and allow it to dry completely — typically two to three minutes. The base coat protects your nails from staining and significantly improves the adhesion and longevity of everything applied on top of it. Skipping it is the most common reason French manicures chip prematurely.
Once the base coat is dry, apply your sheer pink or nude base color in thin, even strokes from the base of the nail to the tip. Start at the center of the nail and then do one stroke on each side. One coat is often enough for a sheer base, but two thin coats produce a more even finish. Let each coat dry fully before applying the next. Rushing this step traps solvents in the lower layer, which causes wrinkling and significantly extends total drying time.
Step 3: Create the White Tip
This is where most beginners struggle, and it is entirely a technique problem. Place your French manicure guide strips or tape just above where the nail bed ends and the free edge begins — this is the natural smile line. Press the guide down firmly along its entire length to prevent polish from bleeding underneath.
Apply white nail polish in a thin, controlled stroke across the free edge, staying within the guide. One thin coat is better than one thick coat — thick coats of white polish are opaque enough but tend to drag and distort the edge. If you need more coverage, apply a second thin coat after the first has dried. Peel the guide strips away carefully while the white polish is still slightly tacky — waiting until it is fully dry can cause it to lift the underlying color.
If you do not have guide strips, the rubber band technique works well: wrap a thin rubber band around your finger just below the nail edge, use it as a guide for your brush stroke, and remove it immediately after painting.
Step 4: Seal With Top Coat
Apply a thin, even top coat over the entire nail, including a stroke along the very tip of the free edge — this is called capping, and it is the single most important factor in how long your manicure lasts. The free edge is the highest-wear area of the nail. Sealing it with top coat significantly reduces chipping and tip wear.
Allow the top coat to dry for at least ten minutes before doing anything that involves contact with water or surfaces. For maximum durability, apply a second top coat layer 24 hours after the first. This is especially worthwhile if you are doing dishes by hand or regularly work with your hands.
Tips for a Longer-Lasting French Manicure
- Apply thin layers throughout — thick layers take longer to cure and are more prone to denting and chipping
- Reapply top coat every two to three days to maintain the seal and surface shine
- Wear rubber gloves when doing dishes or cleaning with products that contain acetone or bleach
- Avoid using your nails as tools — opening cans, peeling stickers, and similar tasks are the fastest way to lift a tip
- Let each layer dry fully before applying the next — patience at this stage pays off significantly in wear time
Frequently Asked Questions About French Manicures
How long does a French manicure last?
With regular nail polish, a French manicure typically lasts five to seven days before showing tip wear. Gel polish versions last two to three weeks with proper prep and curing. Capping the free edge with top coat at the end of application — and reapplying top coat every few days — significantly extends wear time for both regular and gel versions.
Can you do a French manicure on short nails?
Yes. On short nails, keep the white tip very thin — one to two millimeters — to maintain proportion and create a lengthening effect rather than making the nail look stubby. A very fine white tip on short nails can look cleaner and more elegant than a wider tip on longer nails if the technique is precise.
Why is my French manicure chipping so fast?
The three most common causes are skipping the base coat, applying polish in thick layers, and not capping the free edge of the nail with top coat. Capping means running the brush along the very tip of the nail to seal the edge — this is the most impactful single step for preventing early chipping. Applying cuticle oil near the nail edge also softens the seal, so apply it only to the skin around the nail, not directly on the polish.
What is the rubber band hack for French manicures?
Wrapping a thin rubber band around the finger just below the nail edge creates a physical guide for painting a straight white tip line. It provides resistance that helps steady your brush stroke and produces a more consistent smile line than freehand painting for most beginners. Remove the rubber band immediately after painting while the polish is still slightly wet.
Should you apply the base color before or after the white tip in a French manicure?
The standard approach is to apply the base coat and sheer base color first, let them dry fully, then apply the white tip over the dry base. Some nail artists prefer to apply the white tip first and then brush a sheer base color over the entire nail to blend and soften the edge slightly. Both methods work — the choice depends on how defined you want the smile line to appear.